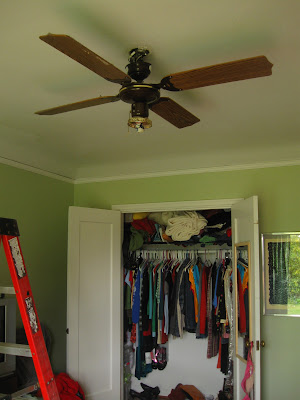
Tag: DIY

  • Real yards have curves

    We got our first real summer weather this weekend! It was sunny and 85 and perfect. Greg and I hit up the “Naturescaping for backyard habitats” garden tour through EMSWCD. They showcased six homes where people had achieved the gold or platinum status from the Audubon Society. There were some really beautiful gardens . . . and there were some really sloppy ones. It turns out I like my gardens a little tidier than some folks. I was sort of bummed about that at first, especially since I’m always telling people, “I like it wild!”

    I like it wild but only in a controlled manner, apparently. This comes as a surprise to absolutely no one.
    I did come away with an overwhelming need to obtain some meadow rue. It’s the airy, lacy, beautiful stuff on the top of this photo and it makes me DROOL.
    Thalictrum occidentale. Crappy photo courtesy of my phone.
    Then I spent all of Sunday taking the leftover stones from the dogbone and using them to define the hillocks in the backyard. The grass has a way of trying to creep up into the beds.
    Before:
    And after:
    As I’m sure you’ve noticed, my camera can’t take a sharp picture to save its life. I keep cleaning the lens to varied effect. I think it’s the universe telling me to buy a nicer one?
    I packed the spaces between the retaining stones with mulch to try and stave off the encroaching grass. It won’t work but it should slow it down.
    It was tricky under the hemlock (Is it a hemlock? Shit if I know.) because you don’t want to bury the roots of the tree or you’ll suffocate it. And then it will fall on your house. I had already stupidly dumped soil and mulch on top of the area beneath the tree last summer. We wanted the stones to look like were actually retaining something, which meant scootching some of that soil and mulch down toward the stones, hopefully giving the root system more air. Or not. Anybody know how to remedy this?
    The blurry photos, they make me so sad. The lack of varied color in this area makes me sad as well.
    I’m liking the formality of the retaining stones so much that I’m tempted to continue some sort of boundary in the new raised bed area. It would really tie the whole yard together.

    I also brought the center curve out a bit, making it easier to mow around it and giving us a spot for the old birdbath.

    My freakshow bulb is awesome.

    Allium schubertii

    I’m having a love affair with fringecups. The cups start out green, fade to white, then turn pink. They are gorgeous.

    Tellima grandiflora
    My dianthus bloomed again, making it totally worth the $2.99 I spent at Home Depot last summer.

    And my Farewell to Springs bloomed this weekend! Oregon, LISTEN TO THE WILDFLOWER. No more rain, please. It’s time for summer.
    Clarkia sp.

    Also: I figured out the secret behind Colony Collapse Disorder. All the bees are in my yard. Sorry about that!
  • And suddenly we have a garden!

    And suddenly we have a garden!

    One single month ago the stump area looked like this.

    The peonies and lupine are growing like gangbusters. I want to divide this lupine next year because the lime green foliage makes me tingly. I want it everywhere. It doesn’t hurt that lupine is a nitrogen-fixer, so other plants benefit from its proximity.

    Alas, I think I need to declare the DIY birdbath a failure. The wood is discolored and I suspect it’s going to rot, despite being coated in something protective. I’m hoping to possibly use it as a form to create a new birdbath out of cement.

    I’ve set my phasers to “lush.”

    I’ve set my phasers to “stunning?” Man, I’m bad at the puns.

    Pretty pretty, shiny shiny! That’s more my speed. Things are growing and I love it.

    Oregon iris Iris tenax
  • The view as of today

    The view as of today

    We still need to work at making this look less like a giant square of cedar chips but for right now we needed to suppress the hoards of weeds that were sure to colonize the area.

    Next up: evergreen plants, rain garden, new tree, deck. Go!

    Edited to add: here’s a reminder of the before:

  • I am so traumatized.

    Remember this?

    We had a guy from craigslist come and do this. Listen for when I tell him to “watch the peonies, brother.”

    Everything looked so good at first. He was removing big chunks of concrete without disturbing the plants around the slab. I mean, check this out:

    Unfortunately, the lawn looked like this. And he dropped a piece of concrete on one of the bloodgood maples on the parking strip.

    Our front yard looks BUSTED. I don’t even want to post photos. It was incredibly stressful watching him barely skim past the side of my house, over and over. He started dropping pieces and I started worrying he would take out my chimney. Remember your mantra when hiring people: “Are you licensed and bonded?”
    I have no idea if he was licensed and bonded because I FORGOT TO ASK.
    But now my yard, my beautiful yard, looked like this. It was traumatizing. I felt like someone had raped and pillaged my happy place.
    Greg and I got up the next morning to start moving the raised beds (I swear I’ll post The Plan soon) and Greg discovered that my Oregon Iris is about to bloom for the first time since I planted it 18 months ago.

    And I swooned and I was happy again. Luckily, nature is good at recovering. We are both trying to remember that. I was shocked at how viscerally I reacted to seeing my yard torn up; I was even more shocked that Greg was upset too. So last night after dinner with his family he thatched and reseeded the lawn in the dwindling light. I took photos of parts of the yard that are still pretty.

    The good news is that I can see the plan coming together now. We dismantled the dog bone and reassembled it where the cement slab used to be. Our shape inspiration was two wine glasses (the stemless kind).

    It the corner behind the wine glasses we’re going to put in a Colorado spruce. This will give us some height in that corner and something green to look at in the winter. We’re gaining more planting space in front of that and I’ll need to really work on getting stuff that’s evergreen. And of course I’ll need to finally yank the weird mystery willow
    So yeah, short evergreen plant suggestions . . . GO!
    Cedar bark is being delivered so we can lay down pathways before everything turns to weeds. Then the boy and I can get down to the sweet business of arm wrestling over who gets to choose what kind of hippie lawn to plant on the old dogbone space. I want something flowering and low water; he wants something that looks like a traditional lawn.
    Of course, he rescued me from a LOT of garden spiders this weekend (new and interesting ones that were SO scary!) and he removed the biggest slug I have ever seen, so I’ll probably let him have his way.
    He’s all curled up here–he was HUGE
  • Shut up, it worked.

    Shut up, it worked.

    I waited too long to order peony cages and then they took forever to get here, so my plants were HUGE. After denuding the smallest plant of a lot of its foliage trying to get the cage on, I decided to try wrapping the peony stems in tinfoil.

     Whatever, it worked.
  • Adventures in closet building

    Adventures in closet building

    The closet before

    The boy has a man cold (poor little bunny) but we soldiered on and installed our Martha Stewart closet organizers this weekend. Part of that soldiering on might have been Greg drinking tea in bed while I sanded and painted but I’ll never tell since I made him use the table saw while I cowered on the kitchen steps.

    The system is actually pretty easy, though we had a few extra prep steps. Follow along!

    For starters you’ll want to get rid of this old timey shoe rack. I am totally down to keep stuff that is original to the house, but this is right smack in the middle of where the main closet unit will go.

    Hey, that’s the dishwasher! Wave to the kitchen–the kitchen that you can now see from the bedroom!
    Take off the trim that used to hold up the shelf and scream your freaking head off because there’s all kinds of ancient dessicated spiders back there. Make Greg get rid of them and then roll your eyes when he leaves LEGS behind.
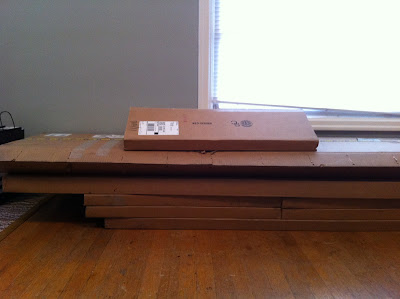
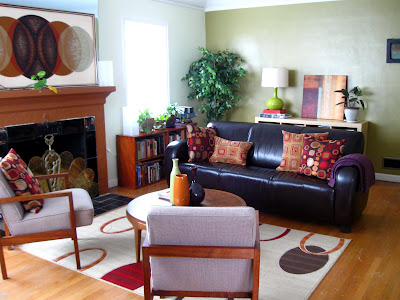
    Marvel at the system you’ve jury-rigged in the living room.
    Add 2x4s and drywall to the space where the shoe rack had been.
    Make sure to measure a few things wrong so you have to hack down the drywall with a kitchen knife. Measure a few more things wrong so you have to shim your 2x4s to get the drywall to sit flush with the wall. Then tape and mud your seams with some old joint compound you found in the basement. It’s a little dry, but what’s the worst that could happen?
    Attach the metal rod thing to the wall studs. This is all that lies between your shelving system and disaster, so do it right. Accidentally knock the drill onto your big toe and throw a temper tantrum, declaring that you’re hungry and you need to take a break. Go eat pizza, you big baby.

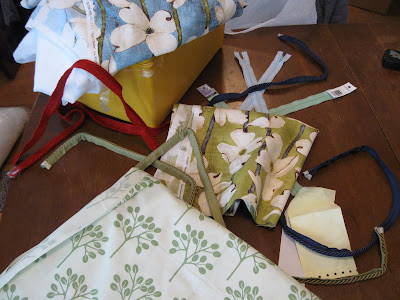
    Spend a good hour or so trying to make sense of the various boxes that are in your office. Ponder why on earth you would have ordered four sets of 12-inch shelves. Once you’ve made sense of where things are going, hang the shelves on the metal rod thing. But first make sure to sand your new drywall ahead of schedule, ripping the tape. You know what? More dried out joint compound should fix that.

    The smart way to do this would be to stop, let the compound dry, let the paint on the area where the trim was dry, paint the drywalled area and let THAT dry, but meh, screw that. Let’s build it now! You can paint that area the next time Greg goes away on business. You wouldn’t rather be eating a big salad and watching Vampire Diaries and sleeping with all the pillows; you’re gonna want to paint some spot in the closet you never look at.
    Assemble your system. Make the most beautiful pilot holes the world has ever seen and brag to Greg that if people got Academy Awards for drilling holes, there would be a little gold man on your mantle right now.
    Stage your closet like they do on websites, as if people have the room to place one pair of shoes on a shelf. Once the pictures are taken CRAM, BABY CRAM.
    Pour yourself a glass of wine and eat the spaghetti sauce from a jar because you’re so freaking tired. High-five each other incessantly. You did it! You didn’t kill each other!
    Seriously though, we’re really happy with our system. Of course, these shelving units are being held to the wall solely by a notch that attaches to a metal rod. And the notched units are made out of pressboard. These aren’t going to last forever but they’re pretty good considering we spent $350 for the whole system.
  • Bird bath, part deux

    Bird bath, part deux

    Last fall, right after I got back from Hawaii, I discovered that the patio umbrella had fallen over, taking the table with it and smashing the top of the birdbath.

    And this tree was chopped down at some point by the previous owner, only to have it sucker back to life.

    While I admire its tenacity, I think I want that stump to be the base of a new birdbath. So I gave it a little haircut.
    And I took out a crummy day at work on the stump with my handsaw (which would have been so much easier with a chainsaw–YOU’RE WELCOME, ENVIRONMENT).

    I was left with these funny guys. Hands in the air!
    Then I grabbed this tray at Ikea. I like the size and the shape. It’s swoopy. But I’m not sure about the pattern.

    Now if the Nootka roses I have on either side would hurry the hell up and GROW the birds would have a semi-private area in which to bathe. And the thorns from the roses would deter any would-be predators. Modesty and security, just what every bird wants!

    But seriously, does this look super lame? Should I stain or paint the tray (in bird-friendly ways, of course)? 

     Vote, yo.

    • Yea! Keep it as is.
    • Meh. You need to do X to make it usable. (Gimme suggestions in the comments)
    • Nay. That’s just a bad idea.

  • Closets! Now with more fighting!

    Closets! Now with more fighting!

    These are boxes of Martha Stewart closet organizers. We’re going to try and build them together next weekend.

    Pray for us.

  • When crafting goes wrong

    When crafting goes wrong

    We had a power outage at the school where I work last week. I was back home by 10am so I thought I’d finally sew some pillows. I wanted to use a contrasting piping with some of my super rad Tonic Living fabric.

    I had a hard time finding a good tutorial (with photos) of how to sew with piping, so I thought, “I’ll create a tutorial and that’ll be so helpful for the internets.”

    And then I made a franken-pillow and whoever invented the sewing machine rolled over in their grave and thought, “I really wish I hadn’t.”

    Sewing is hard, guys.

  • Update on the living room

    Update on the living room

    I still need to switch out the lamp and figure out window coverings and sew new throw pillows, but the living room is starting to feel like a real room again.

    Just a reminder of what it looked like before:

    And the huge cracked mirror behind the artwork on the mantle . . .

     . . . which we had to dismantle . . .

    We know the mirror wasn’t original to the house because it was stamped with “April ’52” all over the back.

    Spackle, spackle, paint, paint, paint! Swap in the boy’s couch for mine and grab the painting from the dining room.

    My grandma was stoked to see her clock over the mantle.

    I found this label in the attic when Greg and I tried to fix the noisy bathroom fan.

    The last mention of the Albina Shingle Company in The Oregonian was on May 3, 1946 when the  factory burned down. So I think that label dates from pretty close to when the house was built in 1938. It very likely came in the package with the original roof.

    The view from the dining room.

    Of course, these didn’t go anywhere. I will not apologize for my Battlestar Galactica prints.

    What do you think? Are my modern pieces playing well with the boy’s traditional couch or do I need to kick him out?